
Getting started
What Tadvio does, when to use Studio versus AI Resizer, and how to set up your workspace.
- 1What is Tadvio?
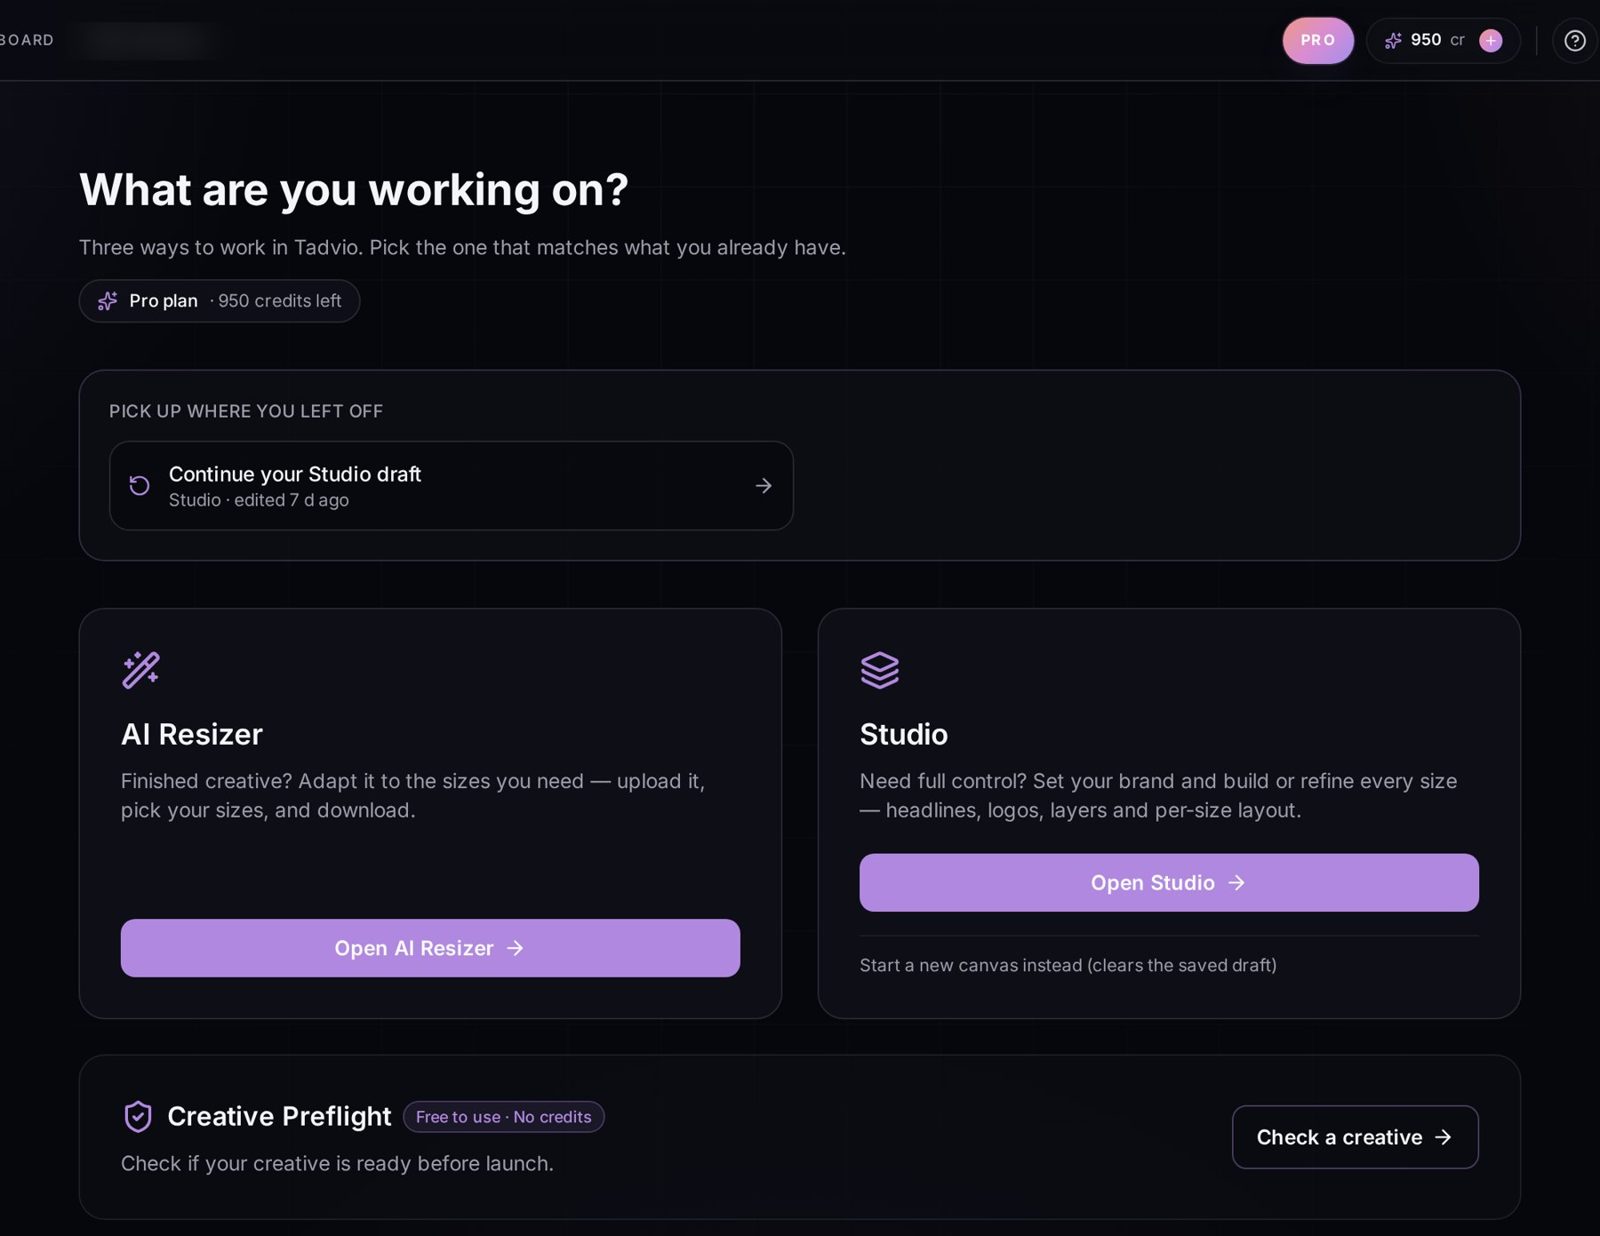
Tadvio produces the ad sizes a campaign needs from work you already approved. Studio builds and edits creatives across sizes with full control. AI Resizer adapts one finished creative into other ratios.
- 2Studio vs AI Resizer
Use Studio when you want editable layers: brand rules, text, positions and per-size refinement. Use AI Resizer when the creative is already finished and you only need it in more ratios — results come back as flat images, not editable layers.
- 3Create your workspace
A workspace is created with your account. Brand Kits, saved sizes, credits and resize jobs all belong to a workspace. Switch workspaces from the account menu in the top bar.
- 4Your first Brand Kit
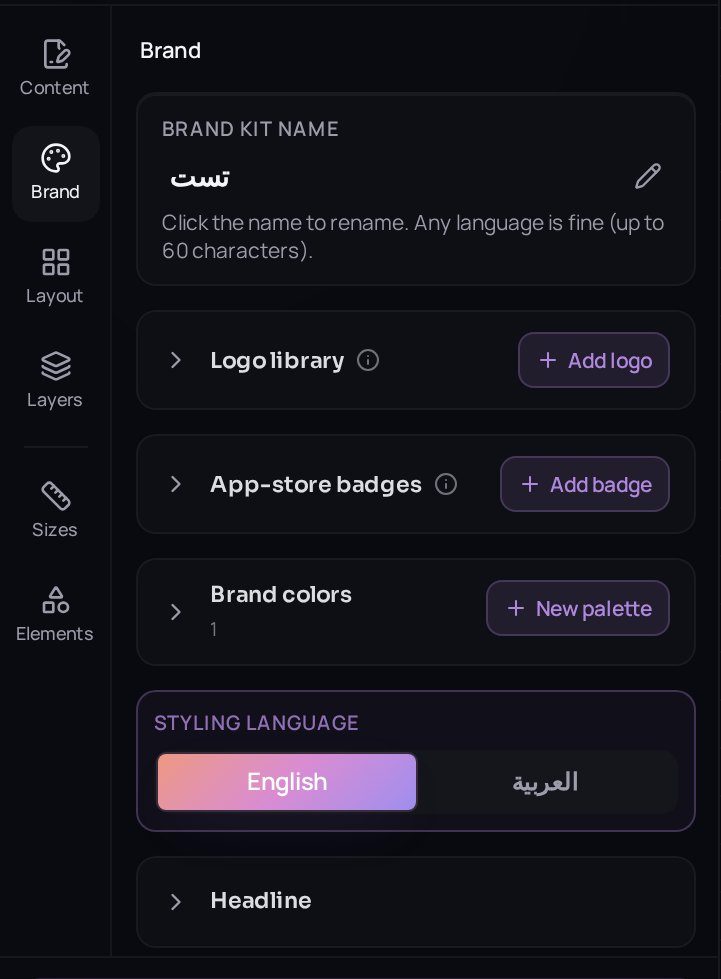
Open Studio and go to the Brand panel. Add your logo, brand colors and fonts once. Those rules are reused for every size you generate afterwards.
- 5Watch the 50-second product tour
The short overview video above walks through the whole workflow. Inside Studio you can also replay the in-app guided tour from the button on this page.
Studio
Brand rules, base visual, generated sizes, per-size refinement, export. Panels can be visited in any order.
- 1Studio overview
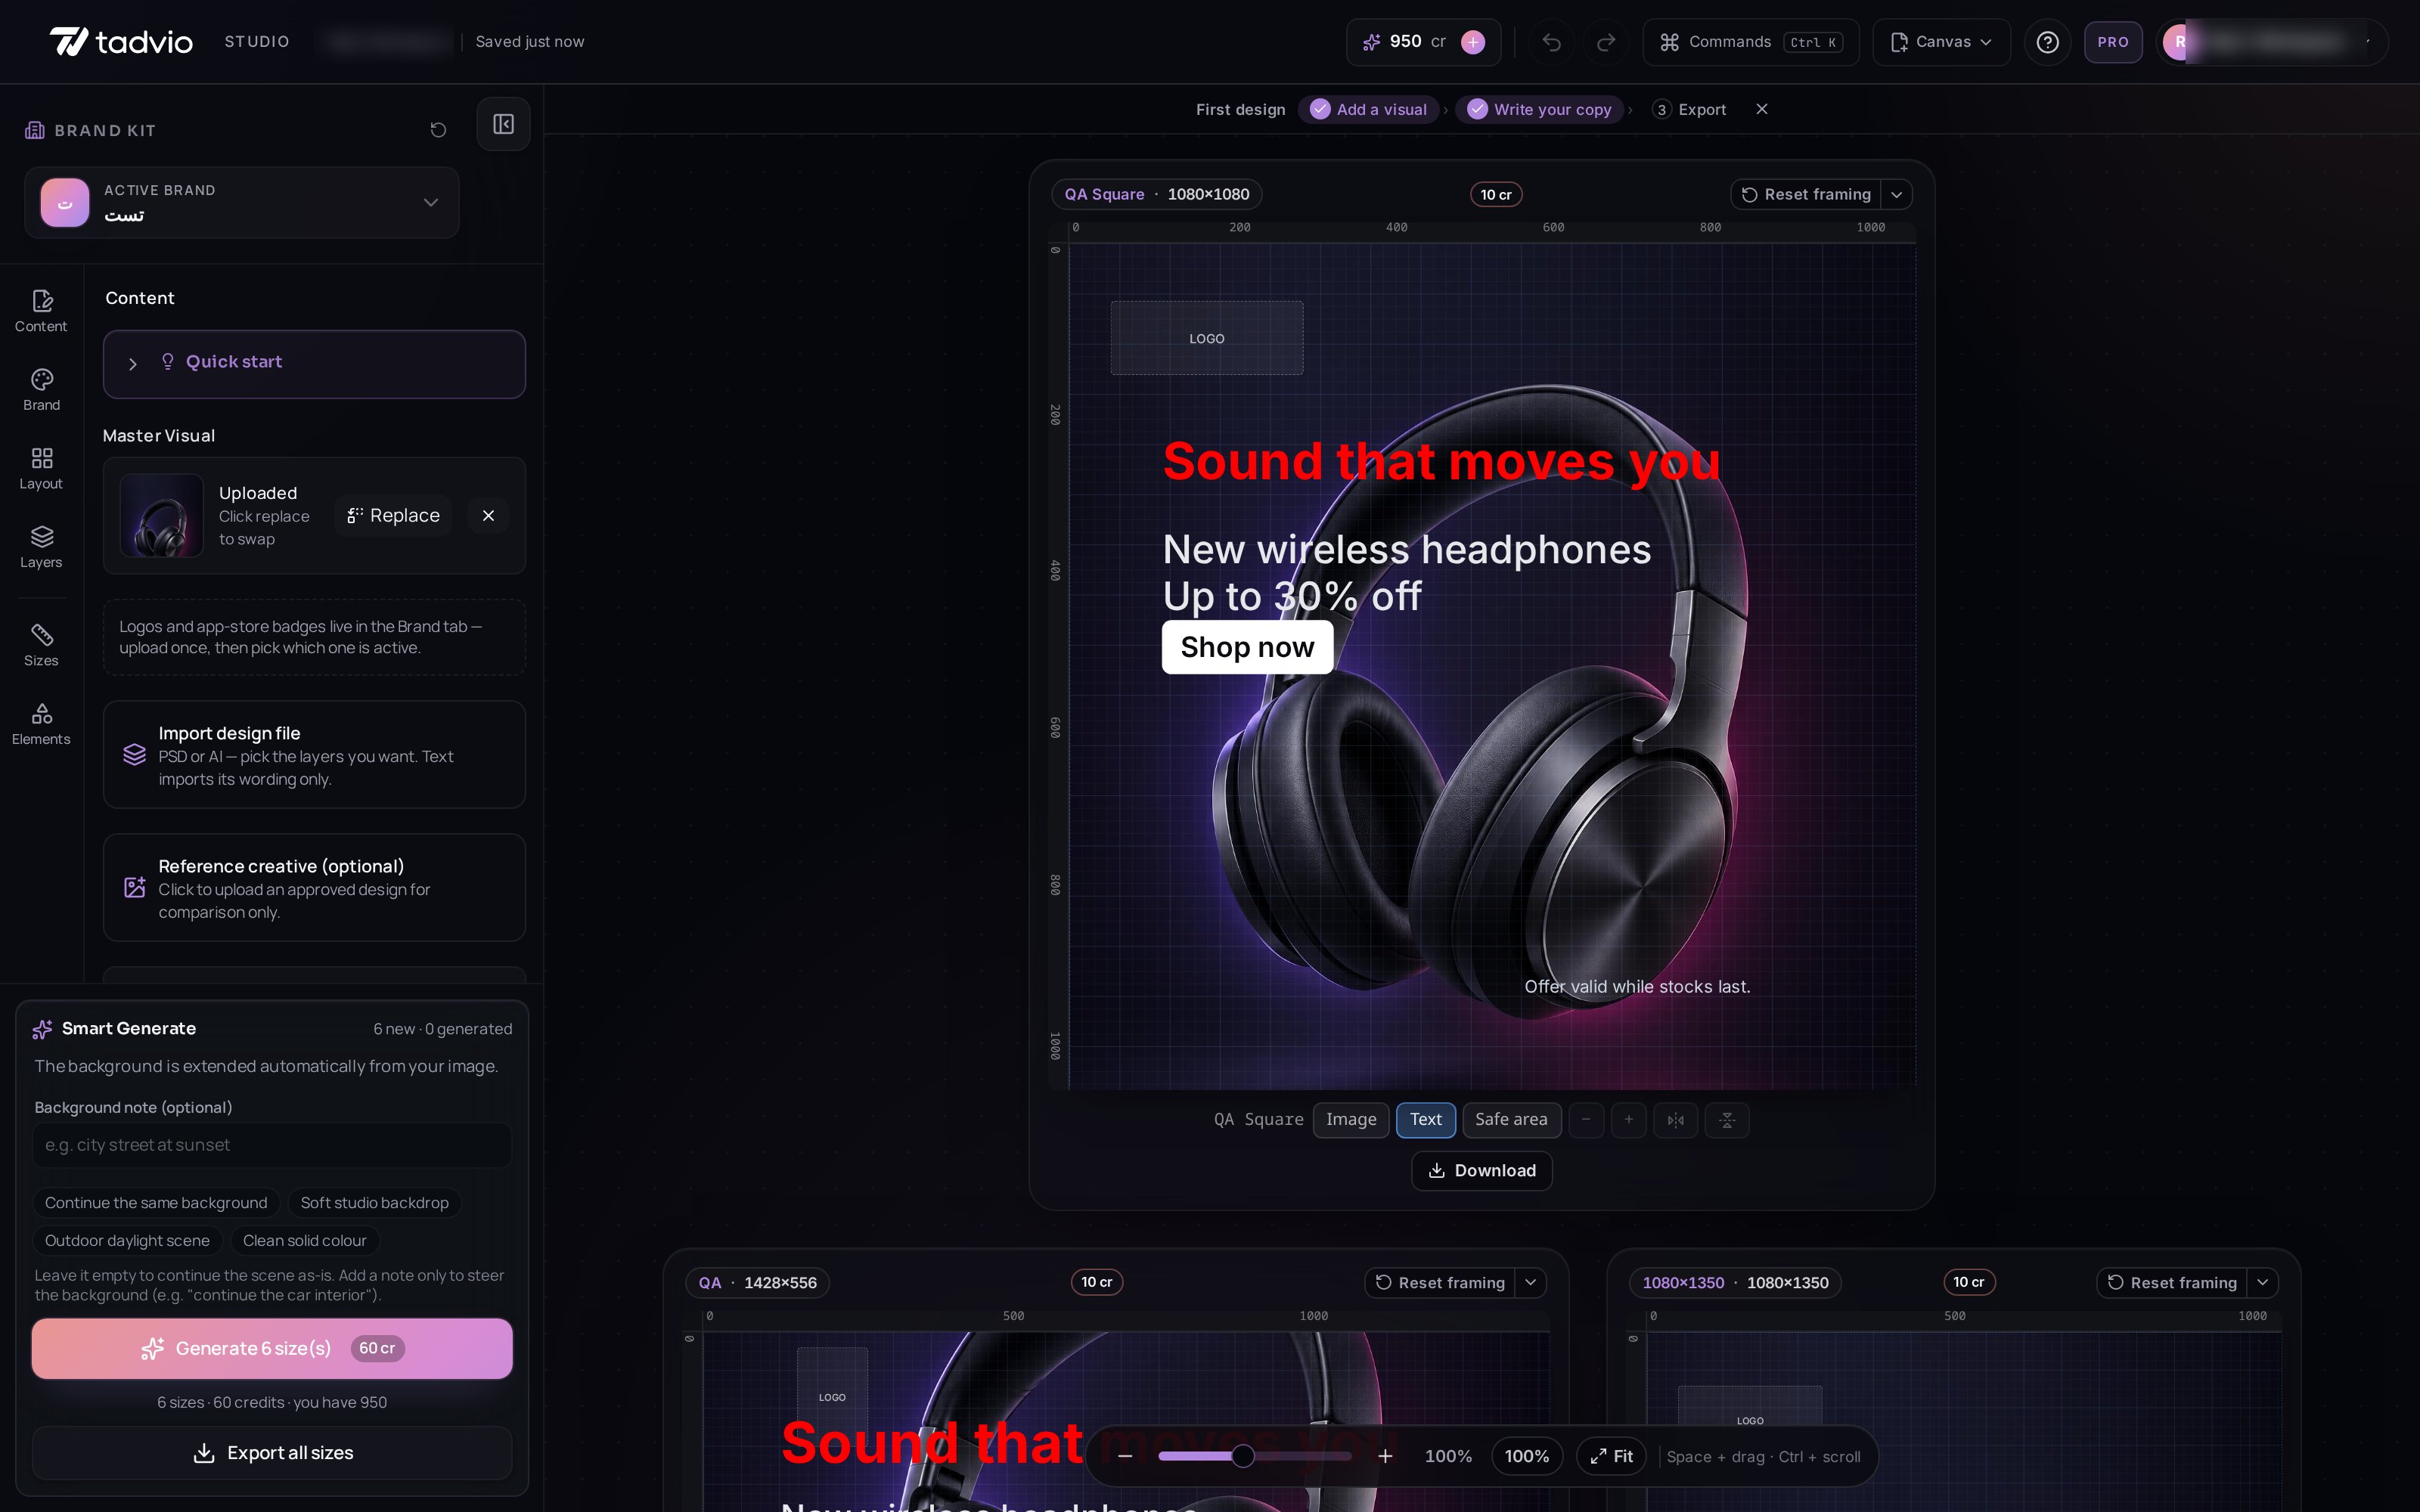
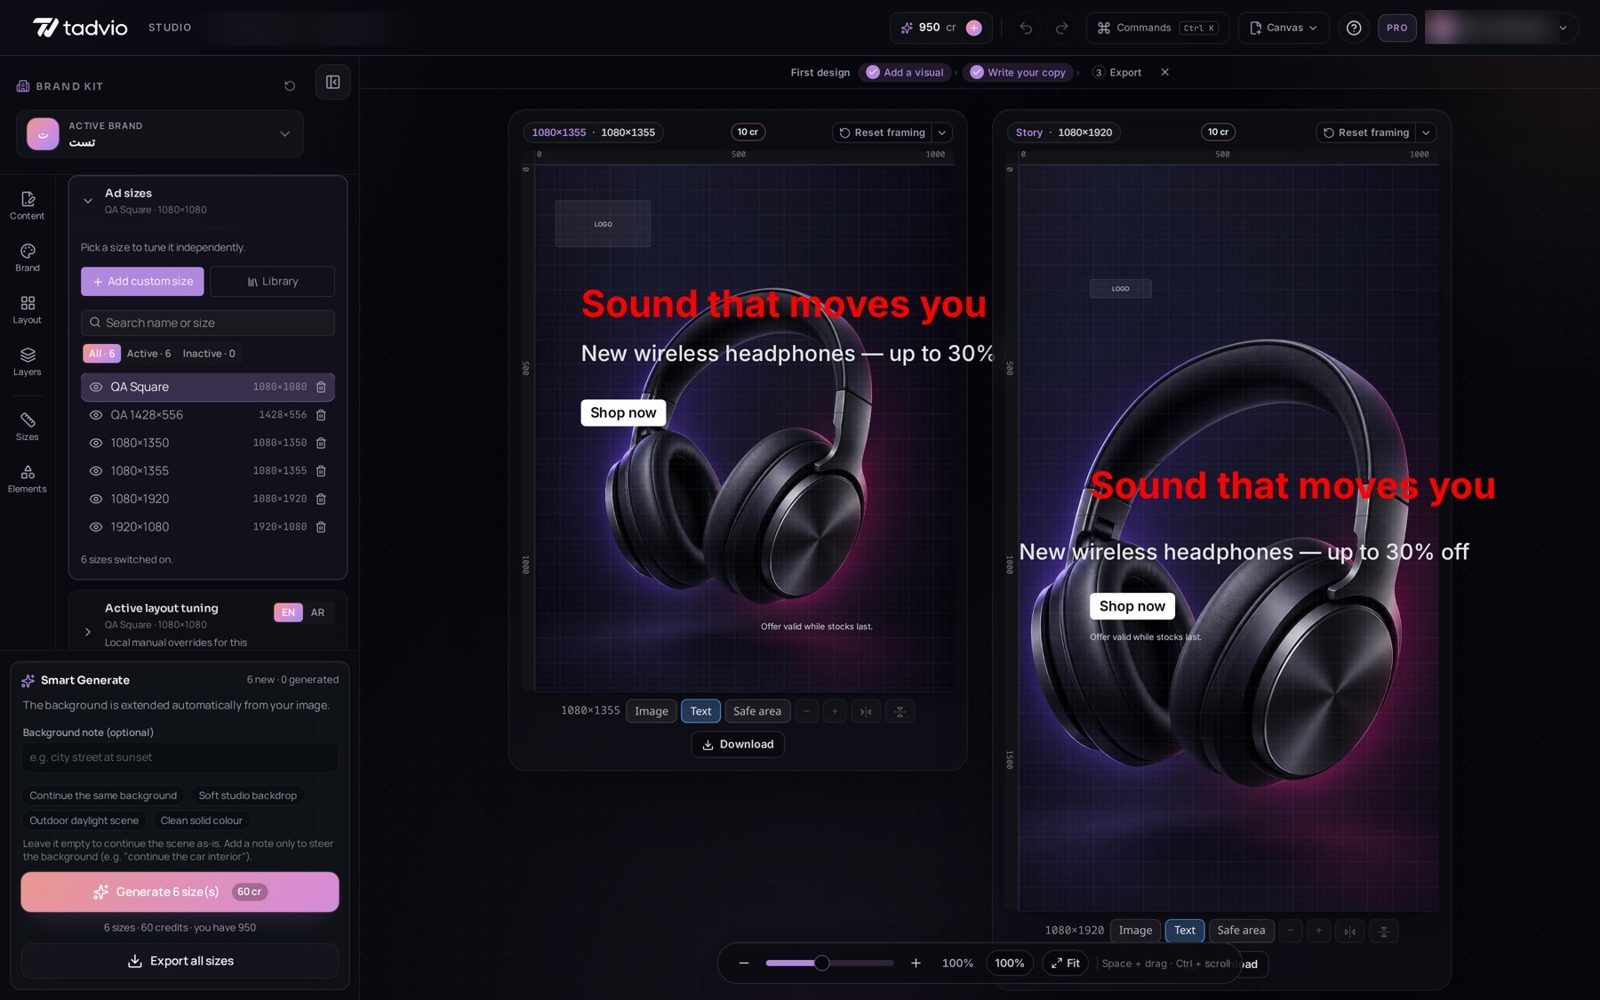
The vertical icon rail on the left opens the Content, Brand, Layout, Layers, Sizes and Elements panels. On large screens a Design panel on the right shows the selected element's position, size and alignment. The usual order is brand setup → base visual → Generate → refine each size → export, but you can move between panels freely.
- 2Brand Kit setup
In the Brand panel, set the logo, colors, typography and text direction for the active Brand Kit. These are reusable production rules — new canvases in the workspace inherit them.
- 3Uploading the base / master visual
In the Content panel, use Master Visual to upload the approved image, or drag it onto an empty canvas. JPG, PNG and WebP up to 10 MB are supported. To change it later, click Replace. The base visual is the single source for every generated size.
- 4Content and text
Headline, subtitle, disclaimer and CTA are edited in the Content panel. Multi-line text is supported — press Enter for a hard break and the layout reflows. The Fill control sets a solid color or a gradient, for all sizes or this size only.
- 5Interface language vs ad text language
The interface language (English or Arabic) controls Studio's menus and buttons. The campaign's Ad text language controls the copy inside your ads. They are separate settings.
- 6Adding and selecting output sizes
Open Sizes in the icon rail. Library adds standard sizes (search by name or dimensions); Add custom size adds any width × height. The eye switches a size on or off — switched-off sizes are skipped by Generate and Export, and only switched-on sizes are charged.
- 7Generating sizes
Generate extends the background of your base visual with AI so every enabled size gets a natural, full frame instead of a stretched image. A cost line above the button shows the credits it will use and your balance. You can add an optional Background note to guide what appears in the new area.
- 8Results appear progressively
Sizes close to your original shape finish first and appear right away. Very different shapes (for example a Story from a wide photo) need more expansion and finish last. Each card shows a quick preview first, then the full-quality image.
- 9Leaving the page during Generate
You can leave Studio while sizes are generating. When you come back, finished sizes from the same base visual are restored automatically.
- 10If a size fails
When a size cannot be generated, its card keeps your original image, shows a clear reason and a Try again button, and the credits for that size are returned automatically. Other sizes are not affected.
- 11Use original image
Under Image options, Use original image returns the sizes to your uploaded visual without the AI-extended background.
- 12Editing individual sizes
Every size can be adjusted on its own. Drag elements on the canvas, or use the Design panel for exact X / Y and width / height. Floating toolbars appear above a selected image, text or logo for quick actions such as flip, framing, fill and logo version. A small dot marks a size that differs from the shared design; use its menu to reset that size.
- 13All sizes vs This size only
Style and image actions show a scope switch. All applies the change to every size; This size only changes just the canvas you are working on.
- 14Hiding a layer
Click an element on any canvas first — the Layers panel then works on that size. The eye icon hides or shows the layer on all sizes. The three-dot menu → Hide this size only hides it just on the size you clicked.
- 15Safe area
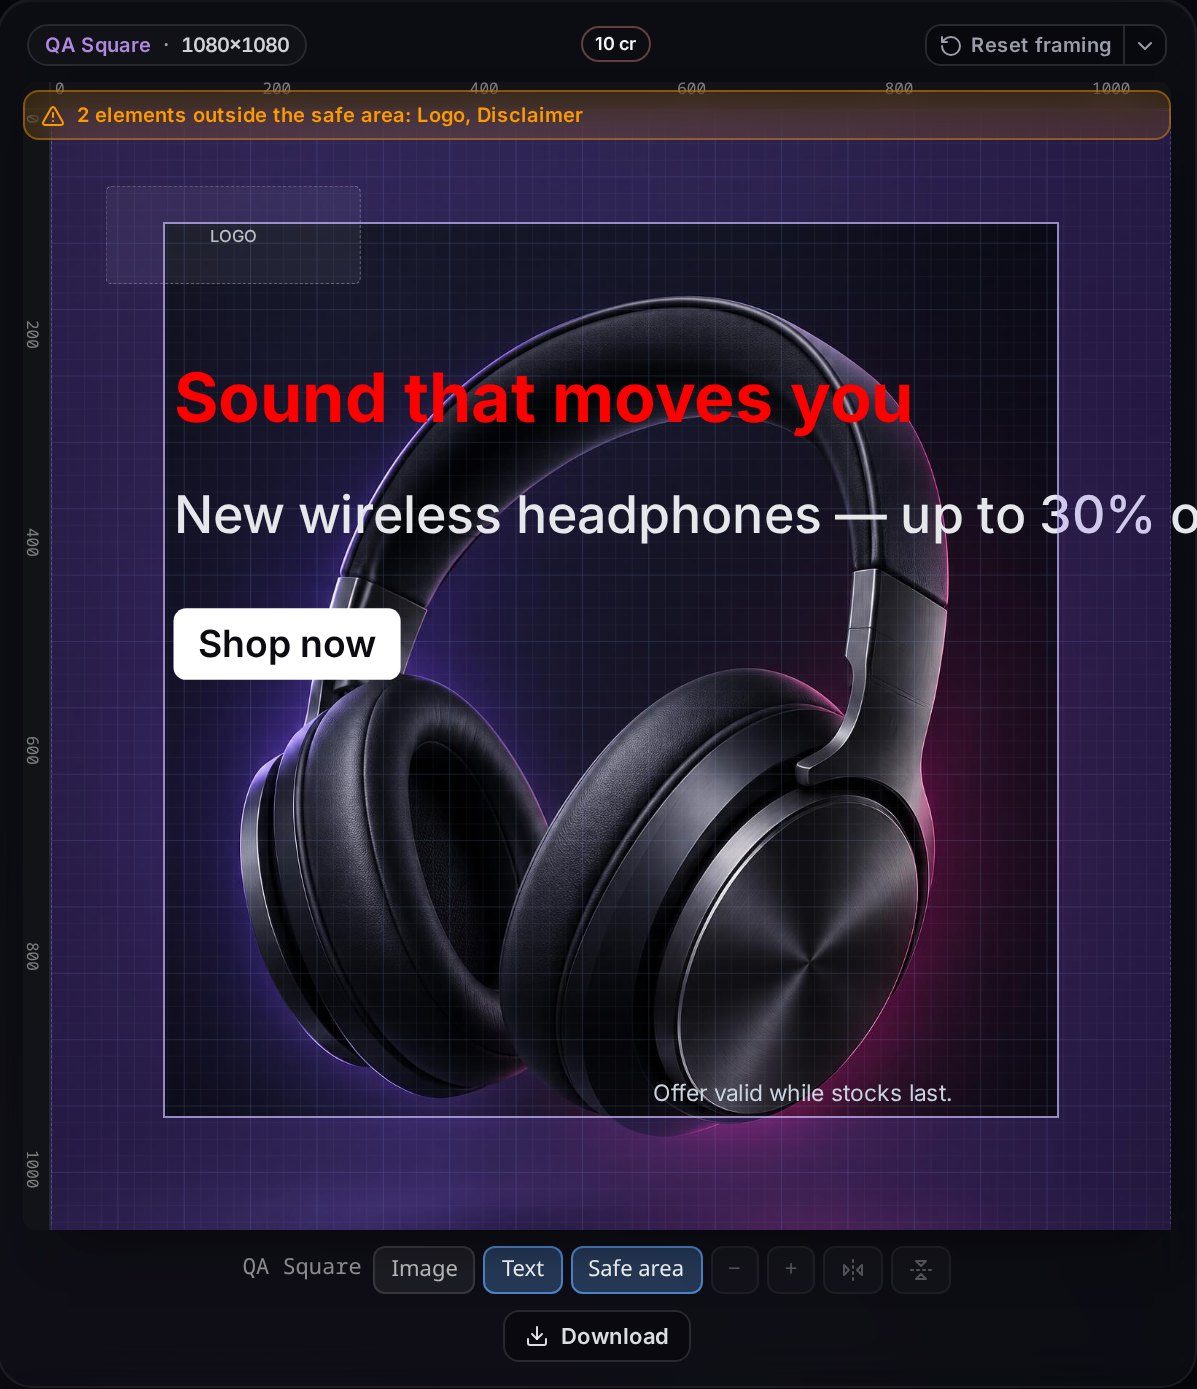
Turn on Safe area for a size to show its safe rectangle. Warnings for elements outside the safe area appear once it is on; elements outside the canvas itself are always flagged.
- 16Snap to grid & edges
Snapping helps align elements to the grid, canvas edges and other elements. Hold Alt / Option while dragging to turn it off temporarily.
- 17RTL & LTR
Switch the canvas language between English (LTR) and Arabic (RTL) with the language control or the L shortcut. Text direction, alignment and CTA arrow direction follow the language; logos and images are not mirrored.
- 18Exporting one size
Use the download icon on a size card to download that single canvas at its exact dimensions.
- 19Exporting all sizes
Export all sizes renders every enabled size and downloads them together as a ZIP. Larger canvases take longer to render.
- 20Free-plan watermark
The editor canvas is never watermarked. On the Free plan a Tadvio watermark is added to exported files. Paid plans export without it.
- LToggle canvas language (EN ↔ AR)
- Ctrl + KOpen the command palette
- Ctrl + ZUndo
- Ctrl + Shift + ZRedo
- Arrow keysNudge 1px
- Shift + ArrowsNudge 10px
AI Resizer
Adapt an already-finished creative into new ratios. Outputs are images, not editable layers.
- 1What AI Resizer is for
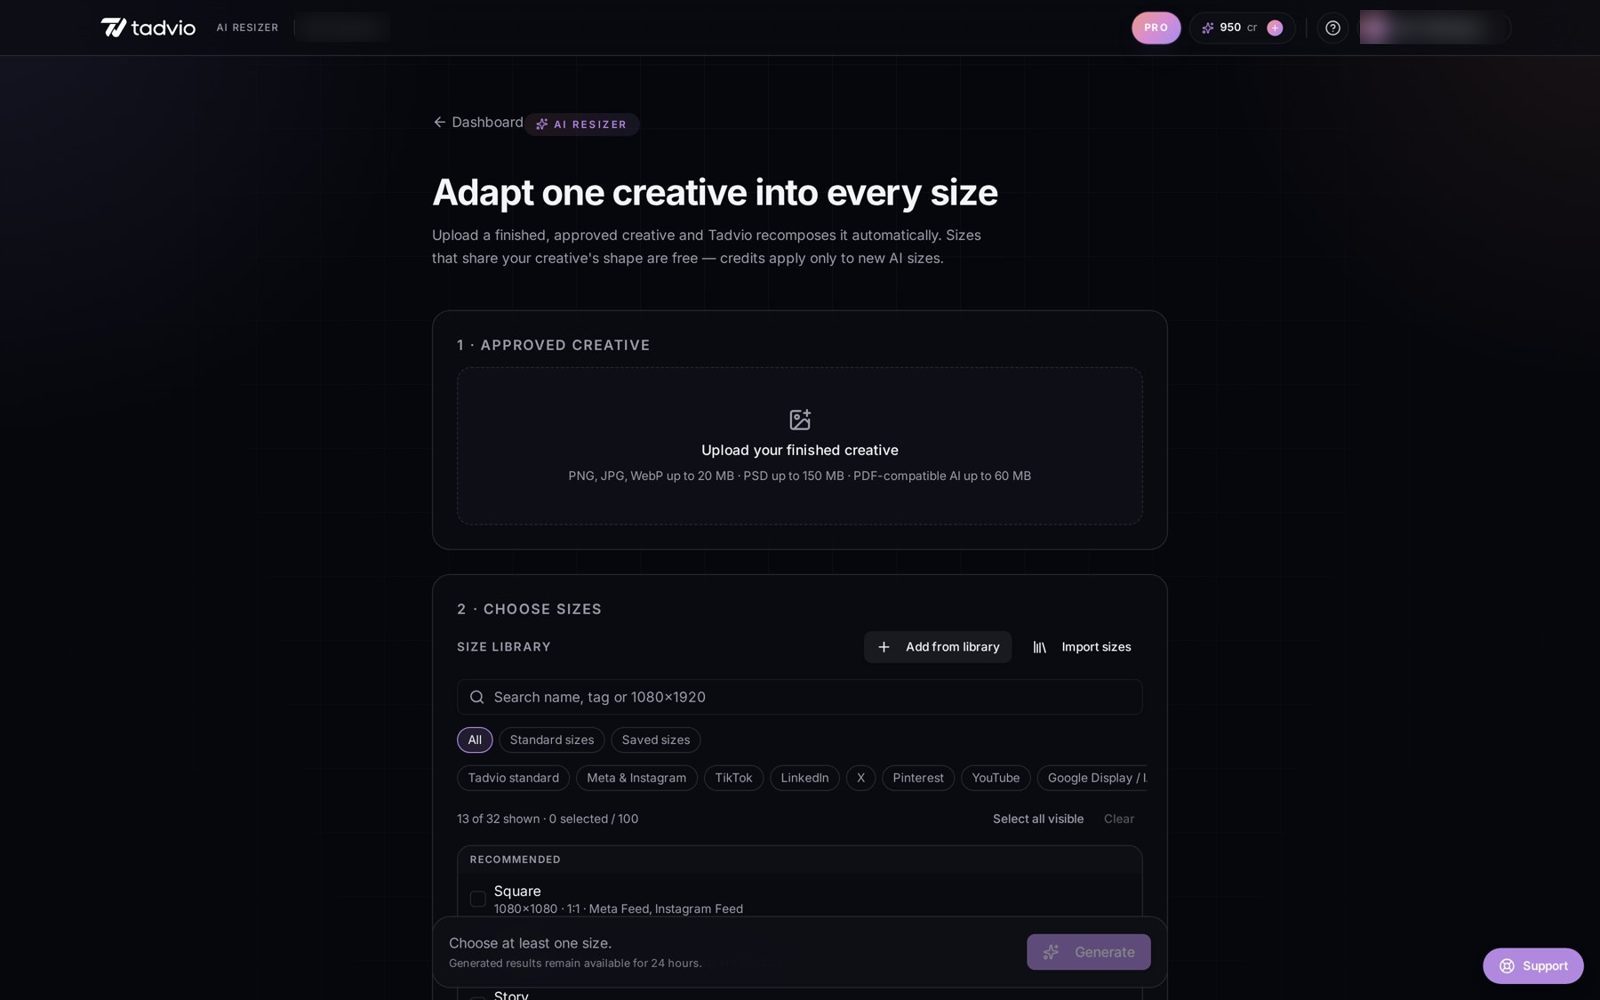
Use it when a creative is approved and finished and you need it in ratios you do not have. No Brand Kit is required. If you need layer-level control, use Studio instead.
- 2Uploading a finished creative
Upload the finished static ad: PNG, JPG or WebP up to 20 MB, PSD up to 150 MB, or PDF-compatible AI up to 60 MB. That uploaded file stays the source for every output in the job.
- 3Choosing sizes
Search the size library by name, tag or dimensions, filter by platform (Meta & Instagram, TikTok, LinkedIn, X, Pinterest, YouTube, Google Display), select many at once, add custom dimensions, or use sizes saved to your workspace. You can also add optional instructions before generating.
- 4Direct Resize vs AI Adaptation
Sizes with the same proportions as your source are produced by Direct Resize and cost no credits. Sizes with a new ratio use an AI Adaptation, which recomposes the creative for that frame.
- 5Same-ratio and shared-ratio behavior
Requested sizes that share one ratio are covered by a single AI adaptation, and each requested size is still returned at its exact width and height.
- 6Credit usage
Each unique new AI ratio costs 10 credits. Direct Resize is free. Downloading results costs nothing extra.
- 7Generation states
Queued means the job is waiting for a worker. Generating means the adaptation is being produced. Ready means the output is available. Ready · Review recommended means the output is usable but worth checking. Failed means the generation could not produce a usable result.
- 8Ready · Review recommended
Preservation checks are advisory, not a failure. When the check is uncertain the result is still delivered — review the important text, logos, offers and overall composition before publishing.
- 9Preview and download
Open a result to preview it, compare it against the source, and download it at the exact requested dimensions. On the Free plan previews and downloads carry a watermark.
- 10Regenerate
Regenerate creates a genuinely new generation for that size and costs 10 credits.
- 11Regenerate with instructions
Add optional layout instructions (for example where the headline or logo should sit) and the new composition takes them into account.
- 12Regenerate always uses the original source
Every regenerate starts again from the creative you originally uploaded. Results are never chained, so a second regenerate does not build on the previous output.
- 13Temporary jobs and 24-hour retention
AI Resizer jobs are temporary and are built around a 24-hour retention window. Download the files you need before the job expires; expired jobs cannot be resumed or downloaded, and you would upload the creative again to start a new job.
- 14Failed generations and refunds
When a generation fails for a technical reason, the credits for it are returned automatically. You can retry the failed size without paying twice for the failure.
Creative Preflight
Check a finished creative against the placements you plan to run, before launch.
- 1What Preflight is for
Preflight is a free check, not an editor — it uses no credits. Upload a finished creative (PNG, JPG, WebP, PSD or PDF-compatible AI) and Tadvio checks dimensions, safe zones, readability and size fit before it goes live. Your creative is not stored during Preflight.
- 2Reading the results
Each planned placement is marked as covered or uncovered by the creative you uploaded, with notes on anything worth fixing. Results are diagnostic only — nothing is generated.
- 3Adapt missing shapes
Use Adapt with AI Resizer to choose exactly which uncovered shapes to send to the AI Resizer. Nothing is pre-selected for you, and prices are shown only in the AI Resizer.
Brand Kits
Reusable brand rules per workspace: colors, fonts, logos and app badges.
- 1Creating and switching Brand Kits
Brand Kits are managed from the Brand panel in Studio. Switch the active kit to work with a different visual identity. How many kits you can keep depends on your plan.
- 2Brand Color Library
Save brand colors into palettes and pick them from any color picker instead of retyping HEX values. Saved colors are a library, not live tokens: choosing one copies the value, and editing a saved color later does not recolor existing creatives.
- 3Fonts
Choose a font for each text style, or upload a custom font file (WOFF2, TTF, OTF). Uploaded fonts are registered for the canvas, the panels and the export renderer.
- 4Mixed-script English & numbers font
Each text style uses its primary font by default. Optionally enable one second font for English text and numbers inside the same layer — the text stays a single editable layer.
- 5Logos, app badges and SVG assets
Upload logo variants and app-store badges into the kit's asset library, including SVG. Switch the active logo or badge without re-uploading.
- 6Workspace and Brand Kit isolation
Brand Kits, uploaded assets and saved colors belong to the workspace they were created in. They are not shared with your other workspaces.
Workspaces & team
What belongs to a workspace, how to switch, and how members work.
- 1Workspace basics
Each workspace has its own credits, Brand Kits, saved sizes, resize jobs and support history.
- 2Switching workspaces
Use the account menu in the top bar to switch between the workspaces you belong to.
- 3Members and invitations
Owners invite members by email from the Workspaces page. Available seats depend on your plan.
- 4What is workspace-scoped
Credits, Brand Kits, brand assets, saved sizes and AI Resizer jobs are scoped to the workspace. Your profile and login are account-level.
- AAcme StudioOWNER
- NNeon AgencyADMIN
- CClient XMEMBER
Credits & billing
How credits are consumed, refunded, and how plans are managed.
- 1What credits are
Credits pay for AI generations. Your current balance is shown in the top bar and is shared by everyone in the workspace.
- 2Studio costs
Generate in Studio uses 10 credits per enabled size. The cost line above the Generate button shows the total before you start. Sizes that fail are refunded one by one.
- 3AI Resizer costs
10 credits per unique new AI ratio. Sizes that share that ratio are covered by the same adaptation.
- 4Direct Resize is free
Sizes with the same proportions as your uploaded creative are resized directly and cost no credits.
- 5Regenerate
A regenerate is a new generation and costs 10 credits.
- 6Technical failures are refunded
If a generation fails for a technical reason, its credits are returned to the workspace balance automatically.
- 7Downloads are free
Previewing and downloading results does not consume credits.
- 8Plans and upgrades
Plan tiers control seats, Brand Kits, bulk export and whether exports carry the Free-plan watermark. Upgrade from the plans dialog or the settings billing page.
- 9PayPal subscriptions
Subscriptions are handled through PayPal. Your plan becomes active once PayPal confirms the payment; manage or cancel the subscription from your PayPal account, and the entitlement follows the subscription status.
- 10Credit top-ups
Top-up packs can be bought in addition to a plan from the credit pill in the top bar.
Downloads & files
Output dimensions, filenames, Unicode names and ZIP naming.
- 1Exact output dimensions
Every downloaded file is delivered at the exact width and height you requested.
- 2Named creatives
A named creative produces name_WIDTHxHEIGHT.png. Example: “Summer Campaign” → summer-campaign_1080x1350.png.
- 3Arabic and Unicode names
Non-Latin names are preserved rather than transliterated. Example: “حملة الصيف” → حملة-الصيف_1080x1350.png.
- 4Unnamed creatives
With no name entered, the file is named from the dimensions only: 1080x1350.png.
- 5ZIP naming
A named batch downloads as summer-campaign.zip. Without a name it downloads as resized_YYYY-MM-DD.zip.
- 6Free vs paid downloads
On the Free plan, downloaded files carry a Tadvio watermark. Paid plans download without it.
Troubleshooting
What to check when a generation, upload, font or payment misbehaves.
- 1Generation is taking longer than expected
AI adaptations depend on an external provider and queue depth. Leave the page open or come back later — the job keeps running on the server.
- 2Queued vs Generating
Queued means the size is waiting for a free worker slot. Generating means the adaptation is in progress with the provider.
- 3Review recommended
The output is available, but an automatic check was not confident that all content was preserved. Check text, logos, offers and composition; regenerate with instructions if something is off.
- 4Failed generation
Failed means no usable output was produced. Credits for technical failures are returned automatically. Use Try again on the card.
- 5Missing or expired resize job
AI Resizer jobs are temporary and follow a 24-hour retention window. If the job expired, upload the creative again and re-run the sizes you need.
- 6Retry behavior
Try again re-runs only the affected size. Other Ready results in the job stay as they are.
- 7Upload validation
Uploads are checked for real image content and a maximum pixel count. If a file is rejected, re-export it as a standard JPG or PNG and upload again.
- 8Fonts not displaying
Confirm the font file uploaded successfully in the Brand panel and that the text style points to it. WOFF2, TTF and OTF are supported.
- 9RTL / LTR checks
If Arabic looks wrong, confirm the canvas language, that the selected font supports Arabic, and that the text style is not forcing an English-only font for the whole layer.
- 10Billing or subscription issue
If a payment completed but the plan did not change, wait a moment for PayPal confirmation and reload. If it persists, open a support ticket with the PayPal transaction date.
- 11Contact support
Open the Support widget to create a ticket. Add a description, a category and attachments; you get an email when the team replies, and you can reply in the same thread.
Account & settings
Profile, security and notification preferences.
- 1Profile
Update your display name and profile details from Settings.
- 2Password and sessions
Change your password from Settings. Password reset emails are sent from the Tadvio domain.
- 3Email preferences
Control which product and marketing emails you receive from the email preferences panel in Settings. Transactional emails such as ticket replies still arrive.
Security & file handling
How your uploads are stored, processed and retained.
- 1Private workspace content
Uploads, Brand Kits and generated files are stored in private storage scoped to your workspace and are not publicly listed.
- 2Temporary AI Resizer retention
AI Resizer sources and outputs are temporary and are designed around a 24-hour retention window before cleanup.
- 3External AI processing
AI adaptations are produced by external AI providers, so the creative is sent to the provider for processing as part of generating a result.
- 4More detail
The Privacy, Security and Terms pages carry the authoritative statements on data handling and retention.
Keyboard shortcuts
Studio shortcuts, mirrored from the in-app cheatsheet.
- 1Open the in-app cheatsheet
Press ? in Studio, outside a text field, to toggle the shortcuts dialog.
- ?Open the shortcuts cheatsheet
- Ctrl + KOpen the command palette
- LToggle canvas language (EN ↔ AR)
- Ctrl + ZUndo last change
- Ctrl + Shift + ZRedo
- Ctrl + YRedo (Windows convention)
- EscDeselect the current element
- Alt / Option + DragTemporarily disable alignment snapping
- Arrow keysNudge selected element by 1px
- Shift + ArrowsNudge selected element by 10px